Labels

Showing posts with label sewing. Show all posts

Tuesday, August 30, 2011

Tribal Maxi Dress


My version of a Maxi Dress.
I bought this fabric at clearance (again) at Joann's for 3 dollars a yard and again, had no idea what I would do with it. I thought it would make some kind of dress and this was it. I was hard to get the draping right in the front. At first I gathered it but it was way too baggy, so then I thought..pleats. and it flattened it enough so I didn't feel pregnant. I made the bodice without the white gathering first, but it was just too much print, it needed to be broken up. So I added the white, but it took a lot of messing with to get everything to lay right. I still don't love the cups of the bodice, they are just too full for my girls but I will figure it out. I love the back shoulder straps, they add just enough to be different.


The shoulder strap. Love the gather.


Thursday, August 25, 2011

Full and Frilly Fabric Flowers


Oh, how I love flowers and these are just so cute and I haven't seen anything like them.
I found the idea on the best blog, Make it and Love it, she has so many fun ideas and tutorials.
So I tried it on the only solid fabric that I had lying around (from my son's John Stockon costume) and whipped it up real quick, I mean quick. They were so fast and easy.
I cut out 30-40 circles without trying to be neat and perfect--I just did one base circle from grey felt, then folded the fabric over so I had about 4 layers and cut the circles. After folding them (the circle) into in on it's self into triangles, I started sewing them on. I did a base layer only sewing the tips of the triangle and then added the next layer and the next. The middle I had to sew on by hand but I think each flower only took about 10 minutes! I am going to make a bunch more, maybe try some printed fabric.
If you would like to buy these, head on over to my Etsy shop
https://www.etsy.com/listing/104453173/lot-of-23-different-handmade-flowers-for


Tuesday, August 23, 2011

Hot Pink Apron with Duct Tape Flower

 I made this apron for my new sister-in-laws shower. I took the idea from one of my earlier aprons, the greenish Retro one, because I thought the fabric matched the Retro feel. I used just one package of bias tape for this one.
I love the way it turned out, and I think what really makes it is the Duct Tape flower. I'm going to do a post about how to make them soon, they are so easy and fast. I really love them and their are so many colors of duct tape now, so fun.
The picture is a little weird--like all my photos--because it was time to go to the shower and I almost wrapped it without the picture, so I told my son to hurry and take a picture before I left. Maybe I should start making gifts ahead so that I'm not finishing as I walk out the door ;) 

Don't you LOVE the fabric?


Close up of the Duct Tape flower.


Saturday, August 20, 2011

Blue Dress


Don't mind the knee brace, I forgot to take it off before the photo.

So this is one of the things I have been working on lately instead of blogging, and I LOVE it. I bought this fabric for about 2$ a yard at Joann's on clearance along with some white knit, also on clearance and didn't quite know what I wanted to do with it, until...inspiration struck in the oddest way.
I bought a swimsuit cover up from TJ Max (love that store!) and it was just cute and white, very basic. But on wearing it I thought that changed just a bit, it would make a cute dress. Then I saw a photo of Kate Middleton, who by the way has the best style I wish I had her wardrobe! I can't find the picture online, but she was wearing this cute white dress that was kind of cinched in the middle like I have this dress.
I just had to show the swimsuit cover, I know it's a bad picture.
So I took my cover up and traced it onto a piece of wrapping paper, but made it a little longer. The cover up has arms, but I just wanted the little capped sleeves, so I left off the sleeves. Then I cut an under-dress out of the white knit I had, so easy, then cut the sheer material. I made a sheath about 3 inches thick to hold the tie at the waist, sewed it in and then made a "rope" from a thin piece of fabric. I sewed the "sheath" in about 4 inches lower than my real waist because I wanted the little poof when it was ties. Then looking at it I thought that ruffles would make it just perfect, and it did! The ruffles took a bit to get right, they were just so heavy compared to the sheer fabric and the knit that they kept pulling and hanging weird. I think I had to sew them down about 3 times to get it right.

I really love this dress. It is SO comfortable and I look stylish at the same time. My little brother just got married and I wore this dress to the wedding and my sister had on a dress that was a lot like it, but she paid almost a hundred dollars for hers (haha).

Tuesday, July 26, 2011

Nursing Cover

A close up of the top. You can see the D-ring and the boning. Don't you just LOVE this fabric.
Cupcake Cover

This is my version of the Hooter Hider. My wonderful sister-in-law just had a cute baby girl!! I was sitting with her while she was nursing the other day and she had a cover up, but she said that she felt like it was a bib more than a cover up. I took that as a hint, and made her one that would cover everything even with her other boys pulling at it.
I just love the fabric, she has 4 boys so she needed something girly. I got about a yard and a half, way more than I needed but it was the last on the bolt so I got a deal ;) I folded a square, cut it out and sewed the edges under. Then I cut a length of fabric about 24 inches long and about 5 inches wide. I folded it over, sewed it, then turned it right-side out. I put a 12 inch piece of boning in at the "top" and sewed a hem over it. I stitched it in place so it would have the bend to see the little baby. I sewed the strap on one side of the boning and then made a loop, put a D-ring on, then attached that on the other side of the boning. It was a little bigger than I thought it would be, but the bigger the better, right? I love these so much and wish they had been around when I had my kids. The other thing I love is that they aren't lined, it's only one piece of fabric so you and your little one won't get too hot while trying to feed.

Look how big it turned out! Nothing will pop out with this Cupcake cover.

Sunday, July 17, 2011

Fixing Tent Zipper with Velcro

 This weekend we went camping to Bryce Canyon. Last camping trip our tents zipper broke, so I had to figure something out. The tent is only a year and a half old and we have really liked it. We got it at Kmart for about 150$ and it has been really good for our family. There is lots of room, it is really easy to set up, and makes it through the weather without leaking. We have even had it in a foot of snow and it was good. So being cheap like I am, when the zipper broke I was determined to fix it and not have to buy another tent. Every tent we buy the zipper is the only thing that goes wrong, people have told us that maybe we are too hard on the zippers, but I think that the kind of tents we buy aren't really meant for the amount of camping we do.
So I bought 6 feet of fabric Velcro from walmart for about $6.00, put my sewing machine in my garage, and started pinning on the Velcro.
 I cut the velcro into about 4-6 inch strips and pinned it to both sides of the door. The reason I didn't do the whole 6 feet in one long strip is because I thought that if one part of the velcro started to open, the weight would pull open the whole door. Once they were all pinned I started sewing. I sewed each piece around all the edges with a straight stitch, I did a couple with a zig-zag stitches but it made the velcro not quite as effective. It took a lot longer than I thought it would, but it saved me $150!


The Velcro before it was sewing on.

 I was a little worried that it wouldn't hold up to my families in-and-out for 4 days, but it did AWESOME! I like it better than the zipper. It is easier for everyone to open and close, and we had no issues of the side of the tent getting stuck in the zipper. It wasn't that windy at Bryce, but I think it will hold up to most weather. We had a small sprinkle and there wasn't even a drip of water in. It worked just as good as the zipper, I think. I have a few other tents that I think I will have to change over to velcro.

The finished door. Even the campground at Bryce is pretty.


See how well it closes.


Funny little side note. I was in the garage sewing (which was weird enough) and I had the door into the backyard open to cool down a little. Soon enough, my little flock of chicks had made it in to hang with me! I sat for an hour with my 5 chicks sitting around me, they were sitting on the floor and would look up at me occasionally making their cute little cooing nosies. It was the weirdest sewing experience I have ever had.

Tip Junkie handmade projects

Sunday, April 24, 2011

Fun Spring Apron


Another apron...I know.
What can I say, I love apron and I guess I am becoming the apron lady to my sisters. Anytime there is a birthday or shower they tell me I should make an apron, and that is how this one came to be. My sister-in-laws birthday was a few weeks ago and she is so hard to shop for. So my other sis-in-law said that I needed to make her an apron because she loves the other one's I've made and has wanted one too. So I knew what to get her and I have been looking (loving, fondling, ogling; I sound like a fabric pervert) at this fabric for a while at Joann's wanting to make something from it.
Funny enough, this fabric although new, was the same print on a vintage apron pattern package!
How crazy, right!?
I have never done the heart bodice with the ruffles and they were surprisingly easy. Althoug, next time I think I need to make it just a little wider through the heart-part of it. I made the fabric flower in the center, but then never sewed it on before I gave it to her. I made this the night before we went to breakfast and was just finishing when they came to get me in the morning, I took so long deciding whether or not I liked the flower that I had to leave before I decided!
I think I like it better with the flower...or maybe without....I don't know.
What do you think?


With the flower.
 
Without the flower.


Don't you just love this fabric?!


Tuesday, April 12, 2011

Travel Curling Iron Bag

 I made these two curling iron travel bags as gifts for two fantastic women who are always helping me out, even when I don't think I need it.
They are for when you are on vacation and need to put away your iron and it's still hot. This way you can pop it in this bag and off you go.
They were really easy, but I think that I am going to do them a bit different next time.
I found the pattern for them from a cute blog Rubies and Peals but I did a few things differently.
I made the 2 pieces 6x30 inches but then I made the liner with old jeans, two layers. I quilted it on the inside pink layer, then stitched on the cute top layer. Turning it inside out was really hard because of the jeans. I also couldn't get the top to fold the way that I wanted so I stitched on the ribbon and I think that it made it very cute. I think that a fabric flower would be really cute too. Next time I make this I am going to look for a liner that is for heat, then it will fold the way that I want.
I really love this fabric though. I need to finish the one for me now, somehow when ever I'm making things for others mine never gets done.


Thursday, April 7, 2011

My Skirt Purse

I have been on the look out for a new purse for a while now (my husband says that I am always buying new purses) and I just couldn't find one that I really wanted. I love all the ruffles that are IN right now and I saw a purse kind of like it the one I made.
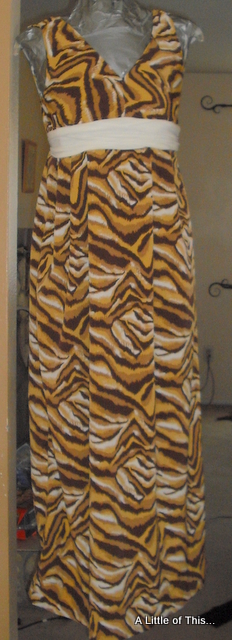
So I pulled out some left over fabric from a dress that I made a few years ago for a trip to Atlanta and started piecing together what I thought I wanted from a purse.


<>
<>
Inside Pink Liner with Pockets


I used some pink fabric that I had from my daughters bassinet skirt from years ago and made a liner with just 3 pockets--one just for my phone (my family can never find it in my purses) and then to give it some stability, I made another liner from some old jeans.


This is the most recycled purse. Cost so far...nothing.


The Jean liner. If you look close you can see the flower at the bottom.

So then I cut 3 long---about 2 to 3 feet---of 3 inch ruffle. I gathered them and sewed them on the purse before I assembled it; So the side of the purse was laid out flat when I attached the ruffles, so easy this way. Then I sewed the bottom--I quilted a cute flower in the liner on the bottom, not that anyone will know but me...but I guess that is who it's for, then I sewed the liner on.
Right before I put it all together
I added the strap, which I put a piece of boning in to give it a bit of stability, then I took some other pink fabric (I don't know where I got this piece from) and made the bow on the side.
Funny story: When I was deciding on the size of the bow, I tied one that was I guess kind of big and my husband said that it was too big and might get caught in the car door. I laughed for about 5 minutes without stopping. The bow was really not that big and just the thought of the bow from my purse getting caught in the door was just too funny.
Anyway, back to the purse. I bought a pink purse magnet at Joann's (1.50 for 2) and added a big safety pin to hang my keys on, which I need to find something else because it detracts from the look, but that will come.
So total cost of the purse, if I am not counting the recycled fabric because really they served their original purpose (and if I counted it the fabric was still only about 5.00$), it was 0.75$ and my time, but that doesn't count because sewing is almost like therapy.
So cute new purse=0.75!
I love it and I have been getting comments about it everywhere I go.


Sunday, April 3, 2011

Running Skirts

I spent the day sewing today and I am so excited that I finally have my running skirts done! Yea! I made 3 today-from the cutting to the finished skirt--- and they were so easy.
I used Jalie pattern for their Multi-Sport Skort and after I got over the shock of a French pattern, it was really easy and the fit was fantastic; so much better than any of the American patterns. The fit is very specific in all the places you measure. Love it!
I only bought a yard of black fabric (at Joann's with my 40% coupon. They have tons of cute "dance wear" fabric), half a yard of pink, and I had the teal from some old pants that I didn't like any more. So the whole thing--all 3 running skirts-- were only $13!!! I have been looking at running skirts for months and the cheapest I could find was still $28+ shipping and tax. I have one already and the fit is just a little off and it is really short, almost too short, and the built-in shorts are just odd. So now I have the skirts and can wear it with whatever short I want. I plan on making the "hot pants" that are with the pattern, but not today. I am thinking that I could look in the clearance mens workout shirts for the the bulk of the color, and get it for like $2-3, and then buy the contrasting color with my % coupon at Joann's. I also added an elastic for the waist: I don't want to lose my skirt while I'm running.
I can't wait to run in these!
The photos are just a bit off because my husband hates taking pictures for me :)
http://www.jalie.com/jalie2796-multi-sports-skort-sewing-pattern.html


Sunday, March 27, 2011

More aprons...

This apron was a gift as well, but I bought it as a kit---I know, hang my head in shame---but it was just so cute and I was short on time. I got it at Joann's using my 40% of coupon and it ended up costing only about 10$. It was easy to make, but the fabric was so awful. It was that stiff, cheap, printed kind. I added a bias tape and gathered a little more than it called for at the flower, but just wasn't quite right. It turned out cute, but it wasn't the quality that I would've liked. I might have to make it with "good" fabrics and see what happens. I think that I would make a fabric flower too instead of the paper one, I could just imagine spaghetti sauce all over it. I LOVE the pearls and flower.

This silly apron was made from a old skirt that my mom gave me that was just too big. I took it apart, keeping the waist and just cutting a curve at the bottom. Then I made a thick ruffle--I love ruffles-- out of some leftover pink that I had from my daughter. Another "free" apron. I think the thing I love the most about this apron is the heart pocket. I feel so girly when I wear it, very french maid. I made this apron for a camping apron....who says you can't be cute in the woods?

Sewing Apron

I love aprons (I think of them as "tool belts") and when I am sewing I always need my little tools and somehow they end up in all kinds of weird places....enter the apron. I looked online at a few half aprons and found some cute "sewing" ones. The ones I liked had pleats so when you are sitting the pockets are right at your hips. I added the scissors loop, but I think that I need to change it. The first attempt I had them--the scissors-- hanging a little more off to the side, and every time I sat down they fell. My little girl is always hovering around me when I sew, so and I was worried about her little toes. So I moved it a little more to the center and and added another loop for the tip to sit in. I also made a small pocket for my small snipers. I love this apron, and I used all old scraps to make it, so it didn't really cost me anything :)


Tip Junkie handmade projects